Editing gameplay videos for your YouTube channel can be a nightmare, but with the right tools and knowledge, you can produce pro-level content.
In this blog post, we’ll take you through the whole process using DaVinci Resolve and show you how to use Viddyoze templates to take your gaming videos to the next level.
Production
Before we get started, gather all your gaming footage and other media. For the example in this blog post we’re using gameplay, face cam and high quality audio commentary.
- Record Gameplay: Use screen recording software to capture your gameplay.
- Face Camera Setup: If you want to include a face cam, set up a camera and make sure you’re well-lit. A well-lit shot makes a big difference in the overall quality of your content.
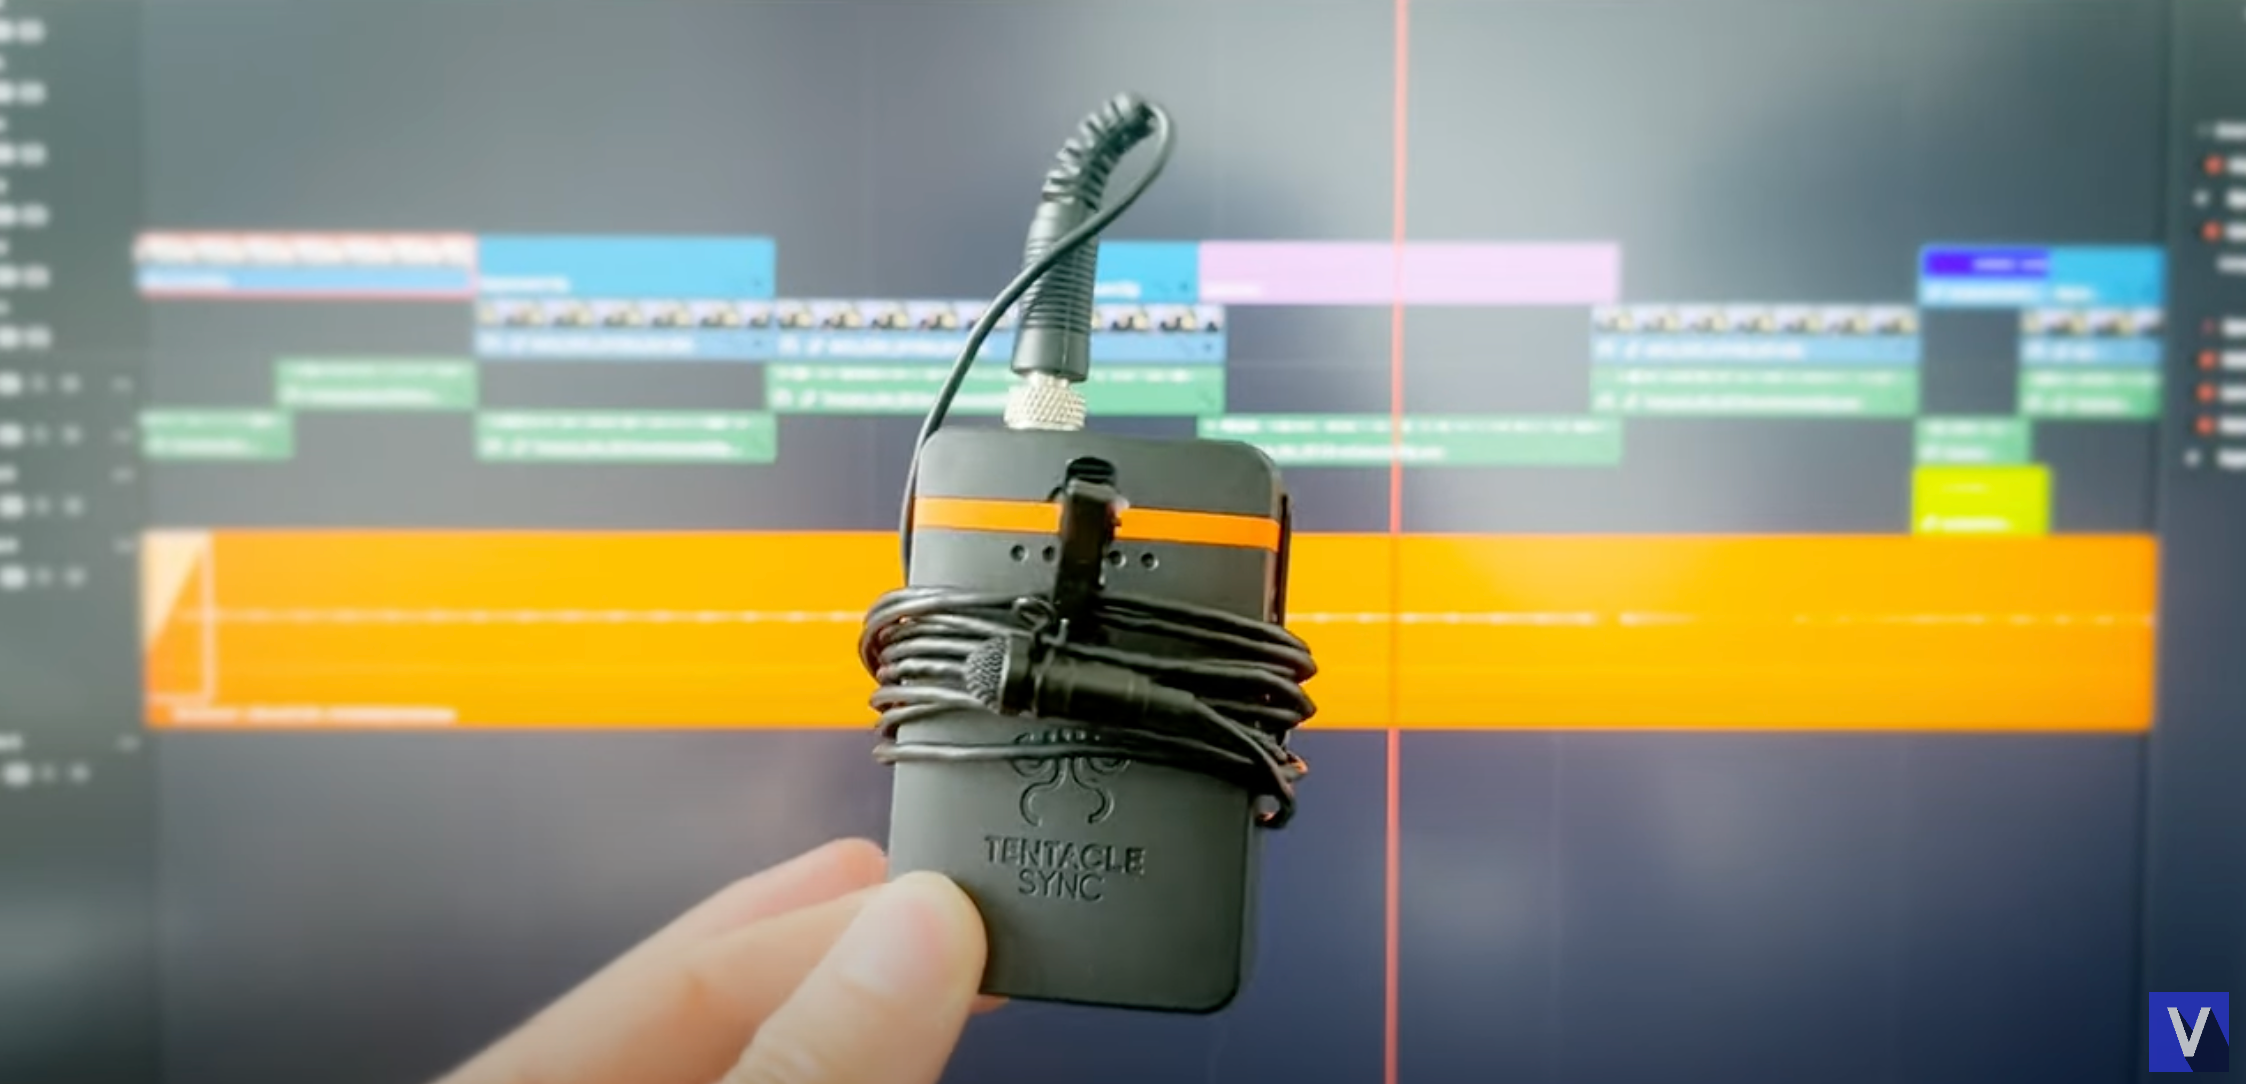
- High-Quality Audio: Use a lapel mic or any high-quality mic to record your commentary.
Post-Production with Video Editing Software
Importing Media
Open DaVinci Resolve and create a new project. Import your media into the media pool. If prompted to change the project frame rate, click ‘Change’ to match your footage.
This is the first step to edit videos efficiently and ensure all your media is organized.
Organise Your Media
To keep things tidy, create bins in the media pool. For example you can create bins for ‘Audio’, ‘Footage’ and ‘Music’. This will keep everything organized.

Syncing Your Media
Face Shot and Audio
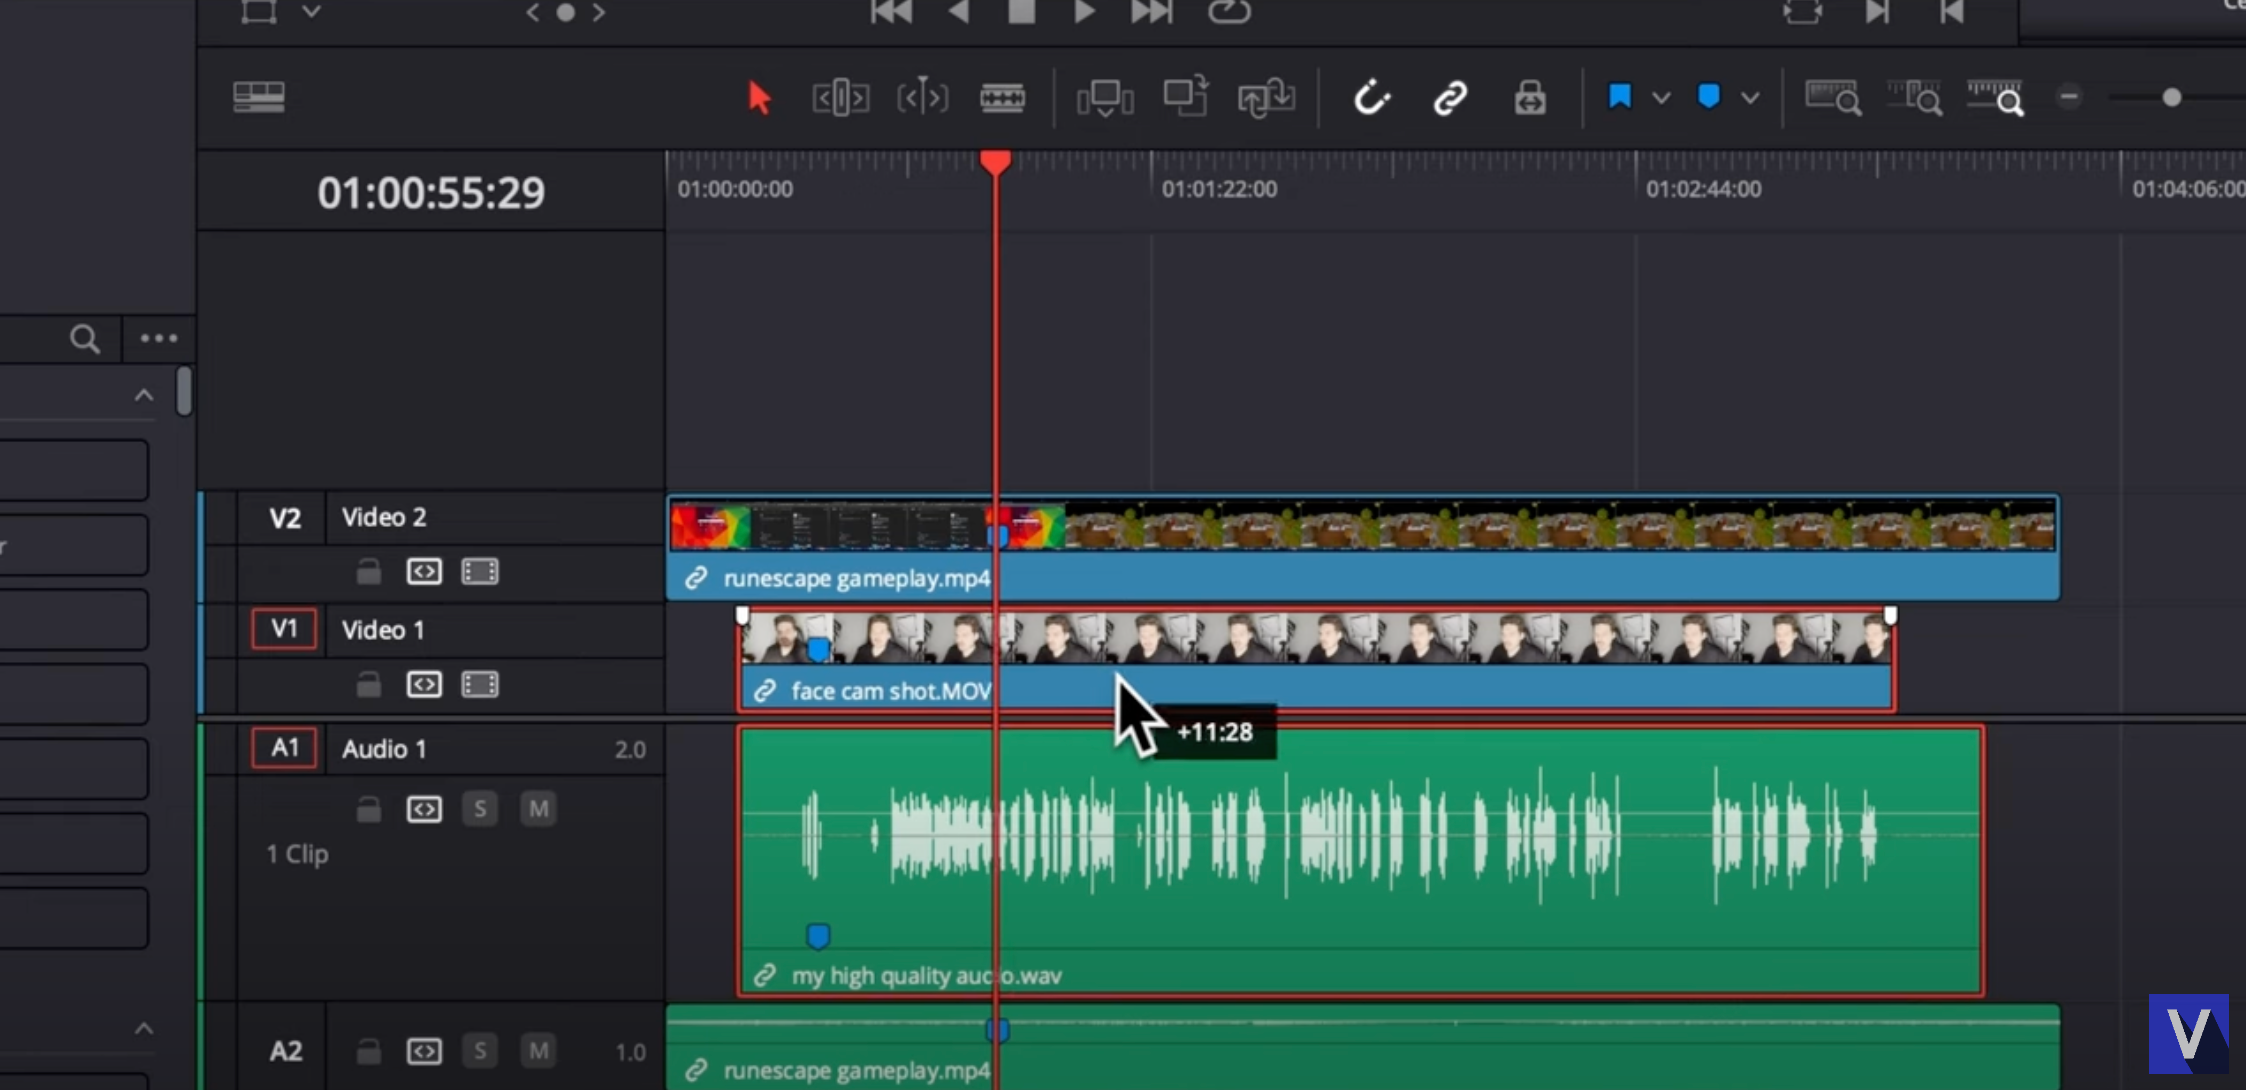
- Drag the face cam footage and high-quality audio into the timeline. Select both clips, go to ‘Auto Align Clips, ’ and select ‘Based on Waveform.’ This will sync the audio and video.
- Manual Sync for Gameplay: For gameplay footage use visual and audio cues for manual syncing. For example if you clapped your hands while recording, find the frame with the clap sound and match it with the corresponding visual frame in the gameplay footage.
- Link Clips: After syncing, link the face cam footage with the high-quality audio so they stay together. Advanced editing software often includes features that make syncing audio and video clips easier.
Framing Your Media
Position and resize your footage for the best visual.
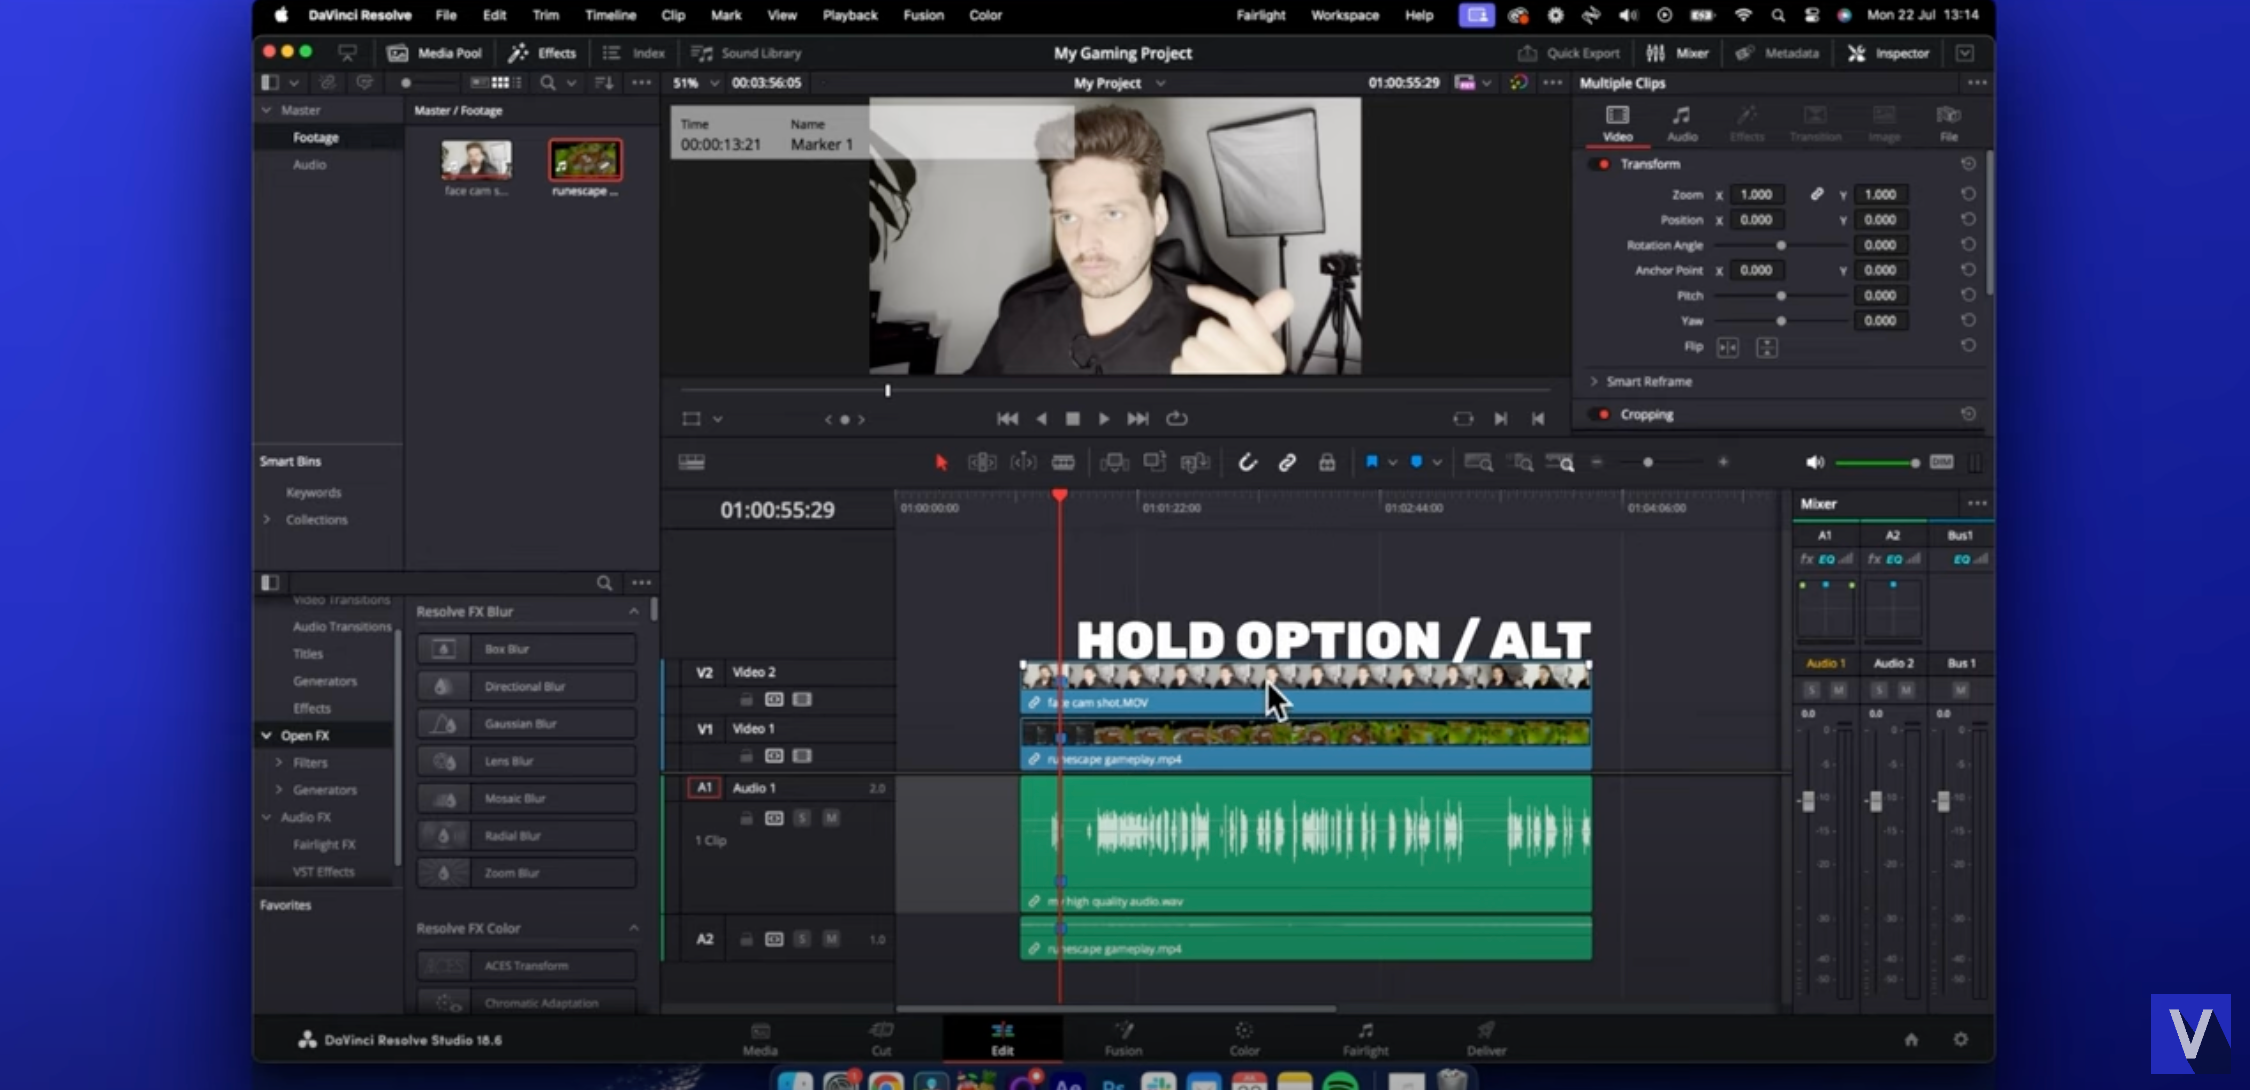
- Face Camera Overlay: Place your face cam footage above your gameplay footage in the timeline. Use the Inspector tab to resize and position your face cam.
- Gameplay Framing: Adjust the gameplay footage so it fits on screen.
A good gaming video editor will offer tools to help you frame your shots perfectly.
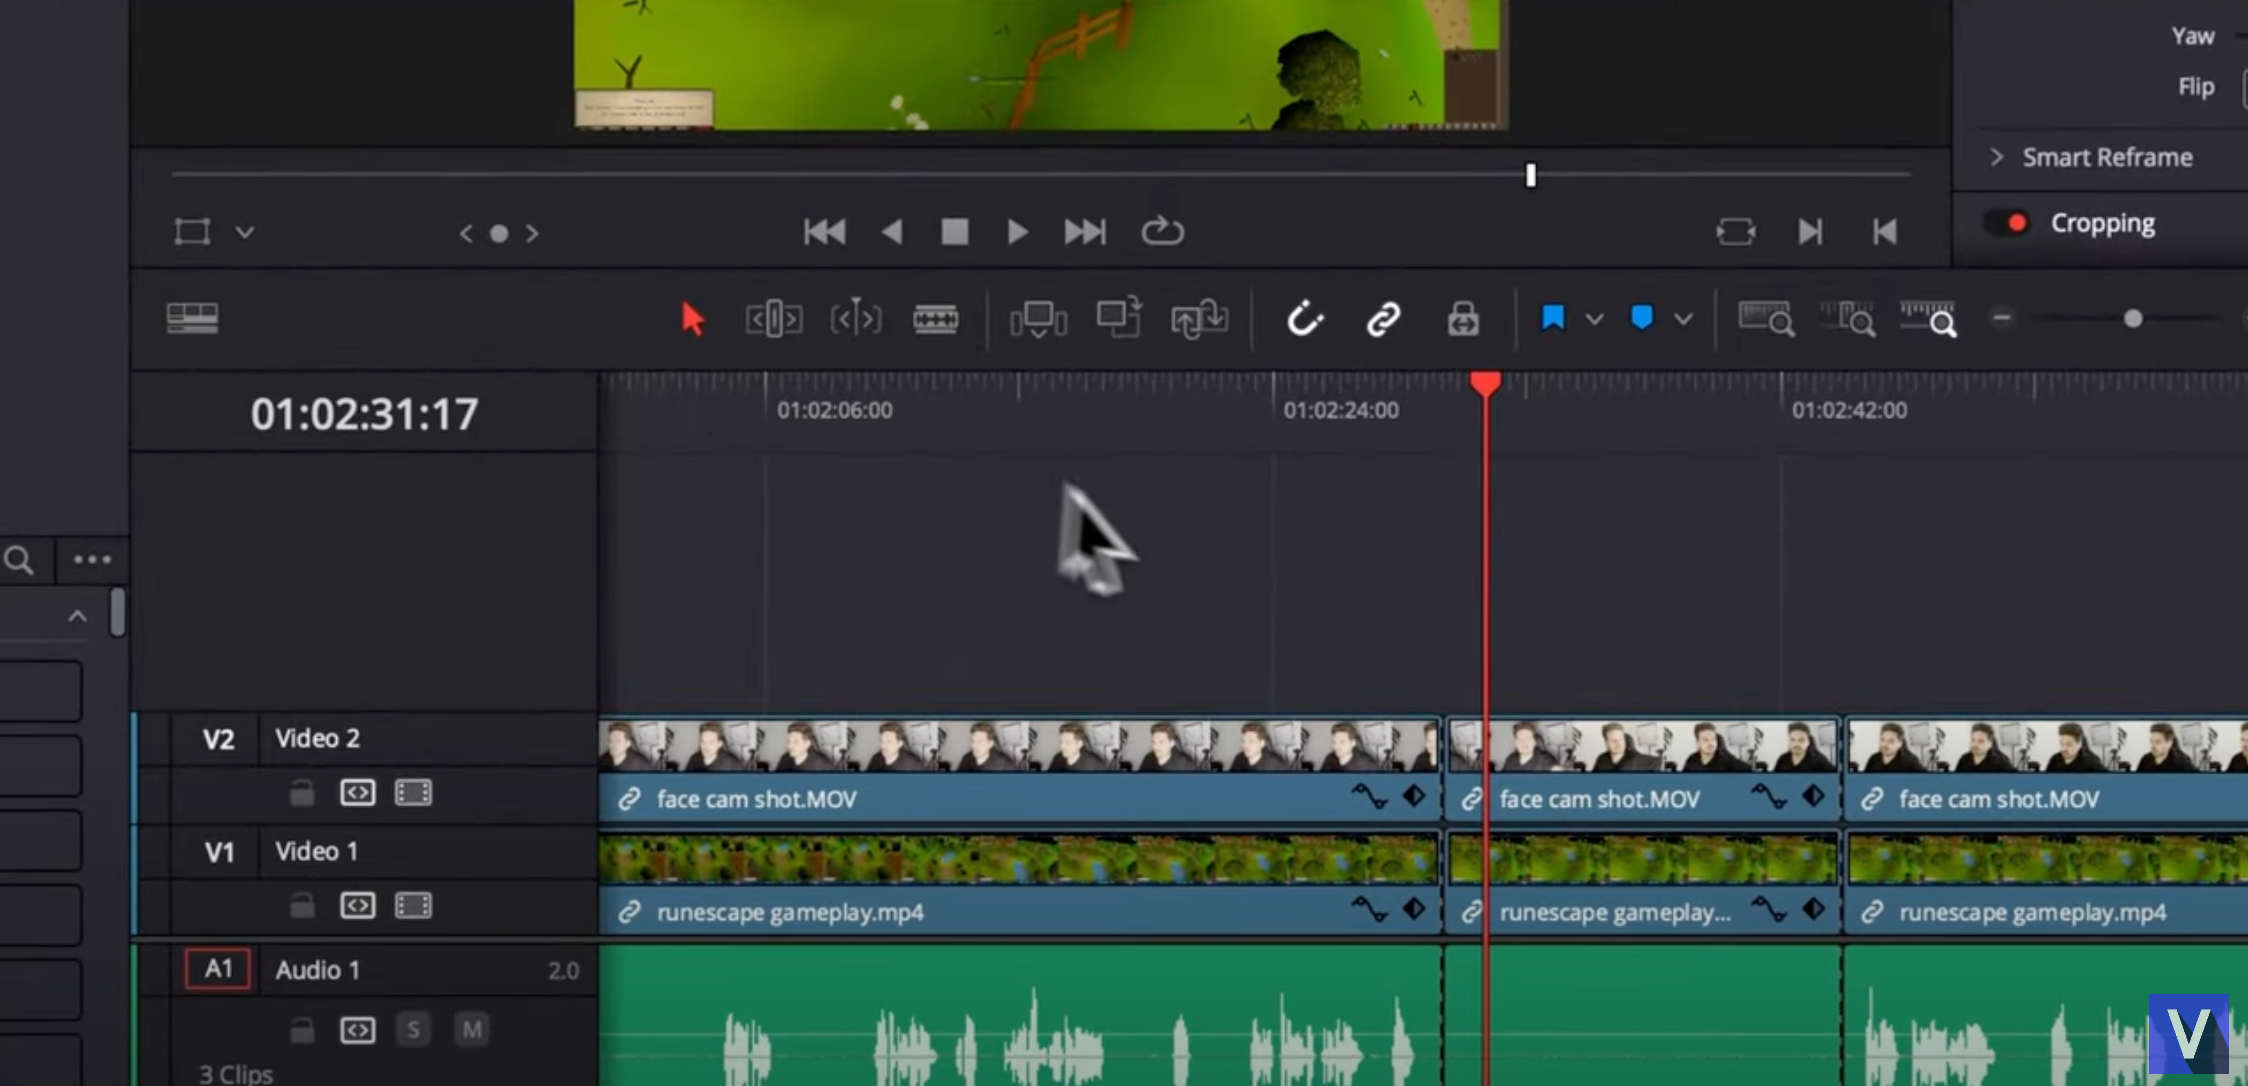
Trimming and Cutting
To keep your video interesting trim out the boring parts. Use the following shortcuts:
- Play/Pause/Reverse: Press J, K, and L to reverse, pause, and play. Press L multiple times to speed up playback.
- Blade Edit Mode: Use the Blade tool to cut out unwanted parts.
- Ripple Delete: Shift + Backspace to remove sections without leaving gaps.
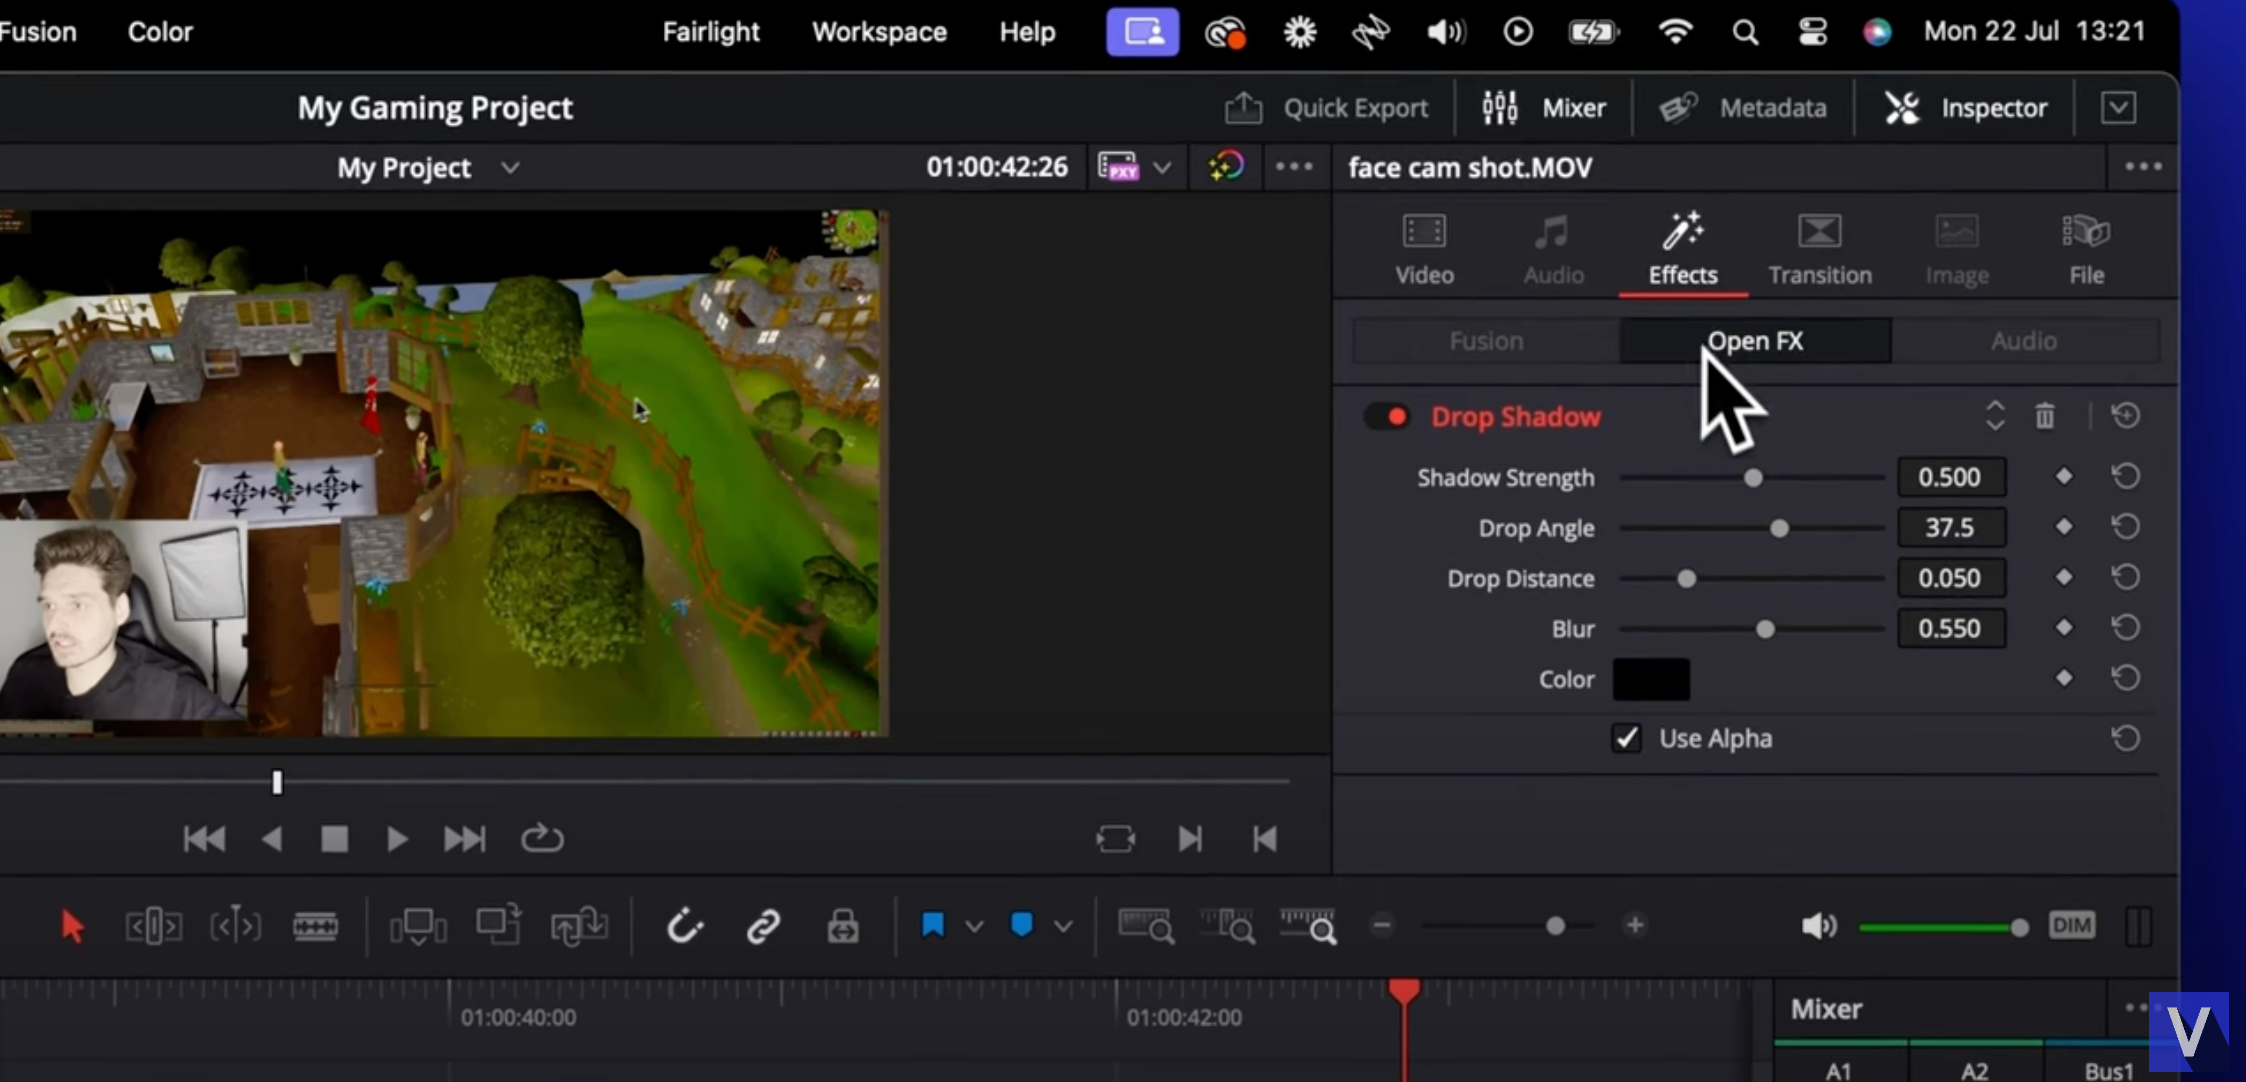
Transitions and Effects
Add some transitions and effects to your video.
- Transitions: Use simple transitions like Blur Dissolve sparingly.
- Effects: Apply effects like Drop Shadow to your face cam footage. Use the Inspector tab to adjust the effect settings.
Viddyoze
For a pro-level finish, use Viddyoze for custom animations and templates.
- Choose a Template: Browse over 3,000 templates on Viddyoze. Pick one that fits your style.
- Customize and Render: Customize the template elements, render the animation, and import it into your DaVinci Resolve project.
- Insert into Timeline: Drag and drop the rendered animation into your timeline where you want it to be.
These animations can add a professional touch to your gaming video, such as transitions, lower thirds, and calls to action, making it more engaging for viewers.
Example
Here’s an example of what a Viddyoze animation can do for your video. In under 2 minutes, you can create a pro-level animation for your video.
Incorporating these animations can take your YouTube videos to the next level.
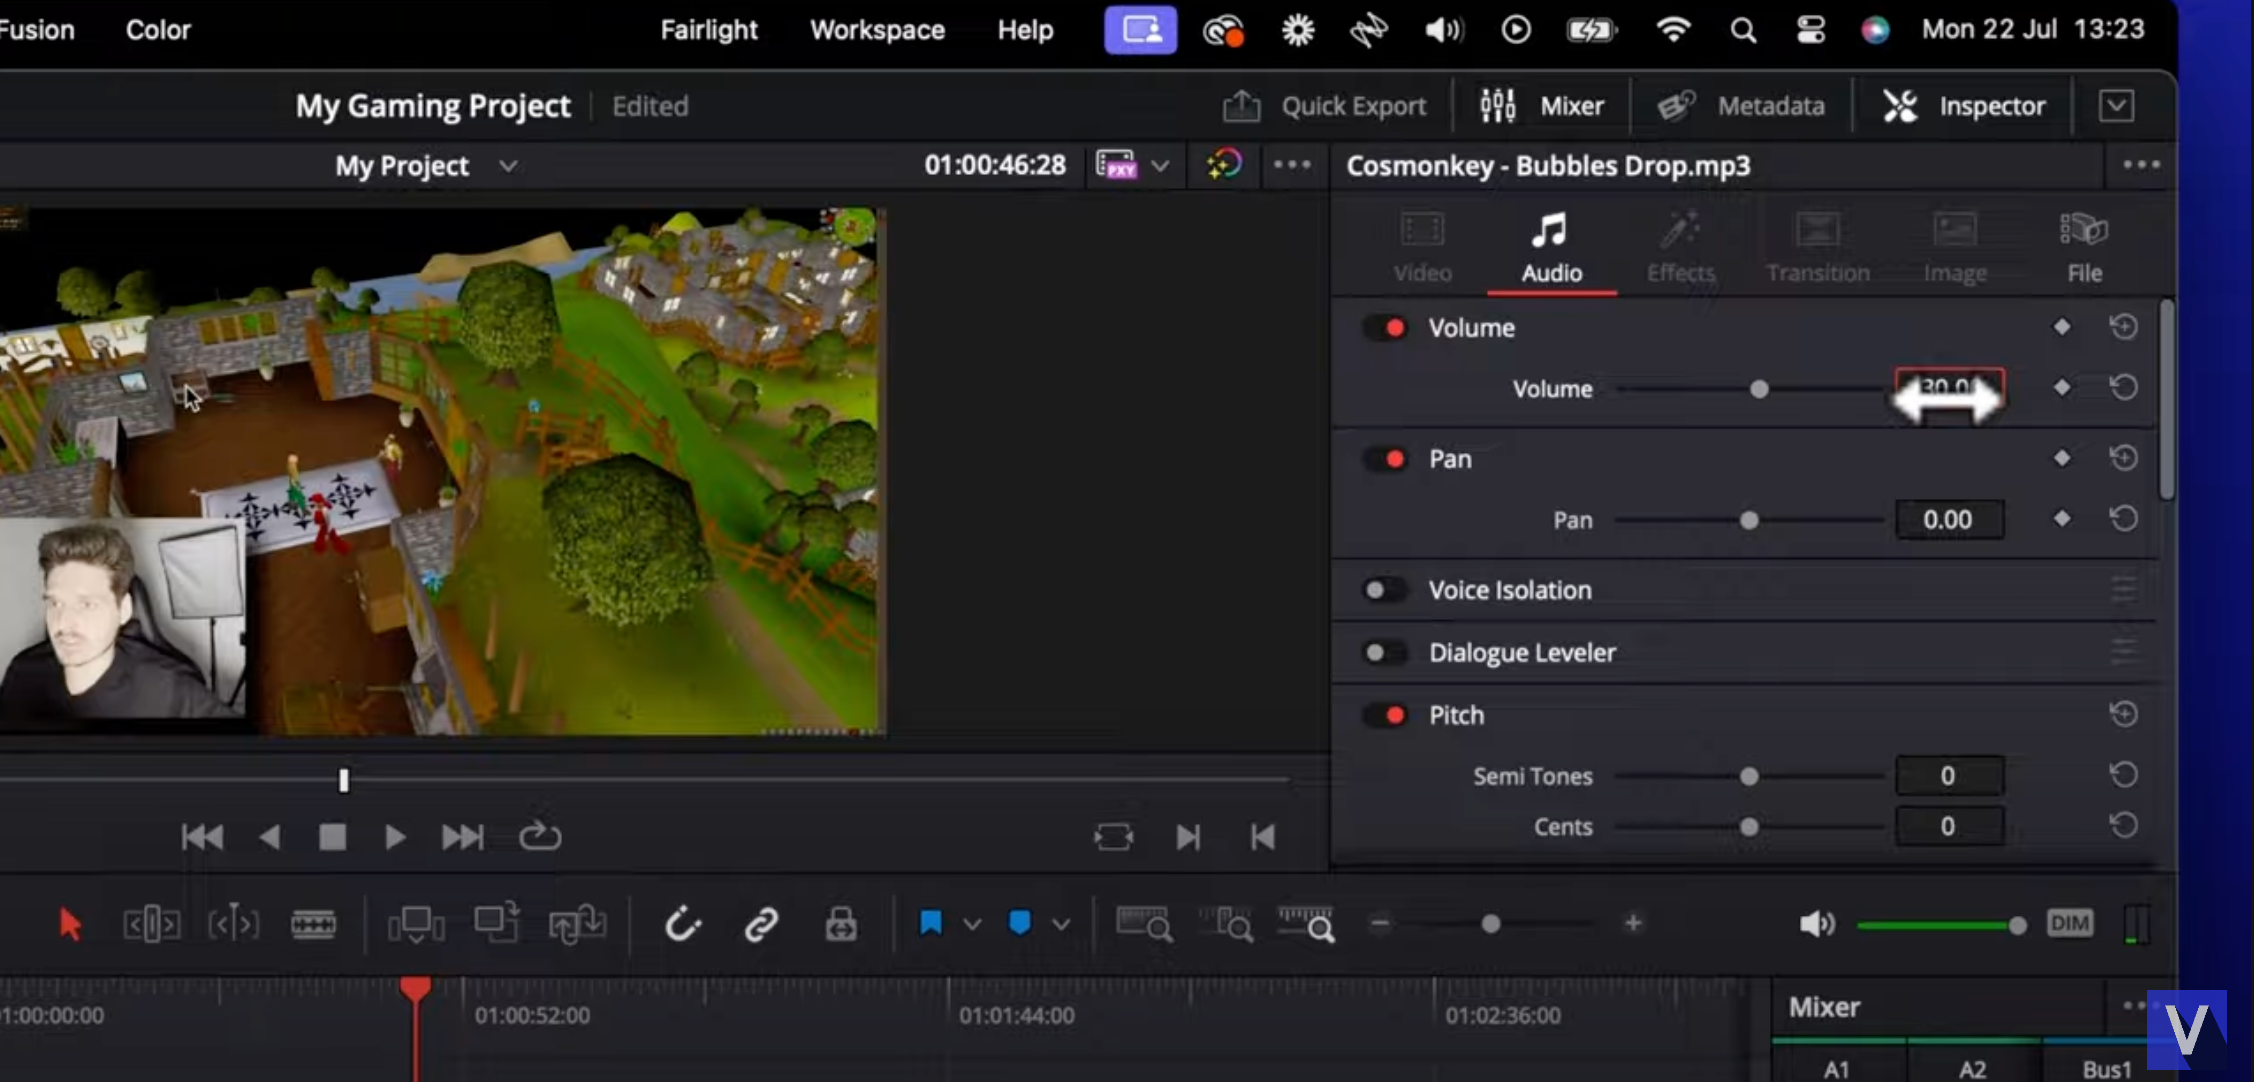
Audio and Background Music
Balanced audio is key for a pro video.
- Add Background Music: Import a music track and trim it to match your video.
- Adjust Volume: Lower the music volume to -25db, so your commentary is clear. Adjust as needed.
- Balance Audio Levels: Use the Mixer tab to monitor and adjust audio levels for all tracks so your commentary is always audible.
Balanced audio is essential for making your gameplay videos enjoyable to watch.
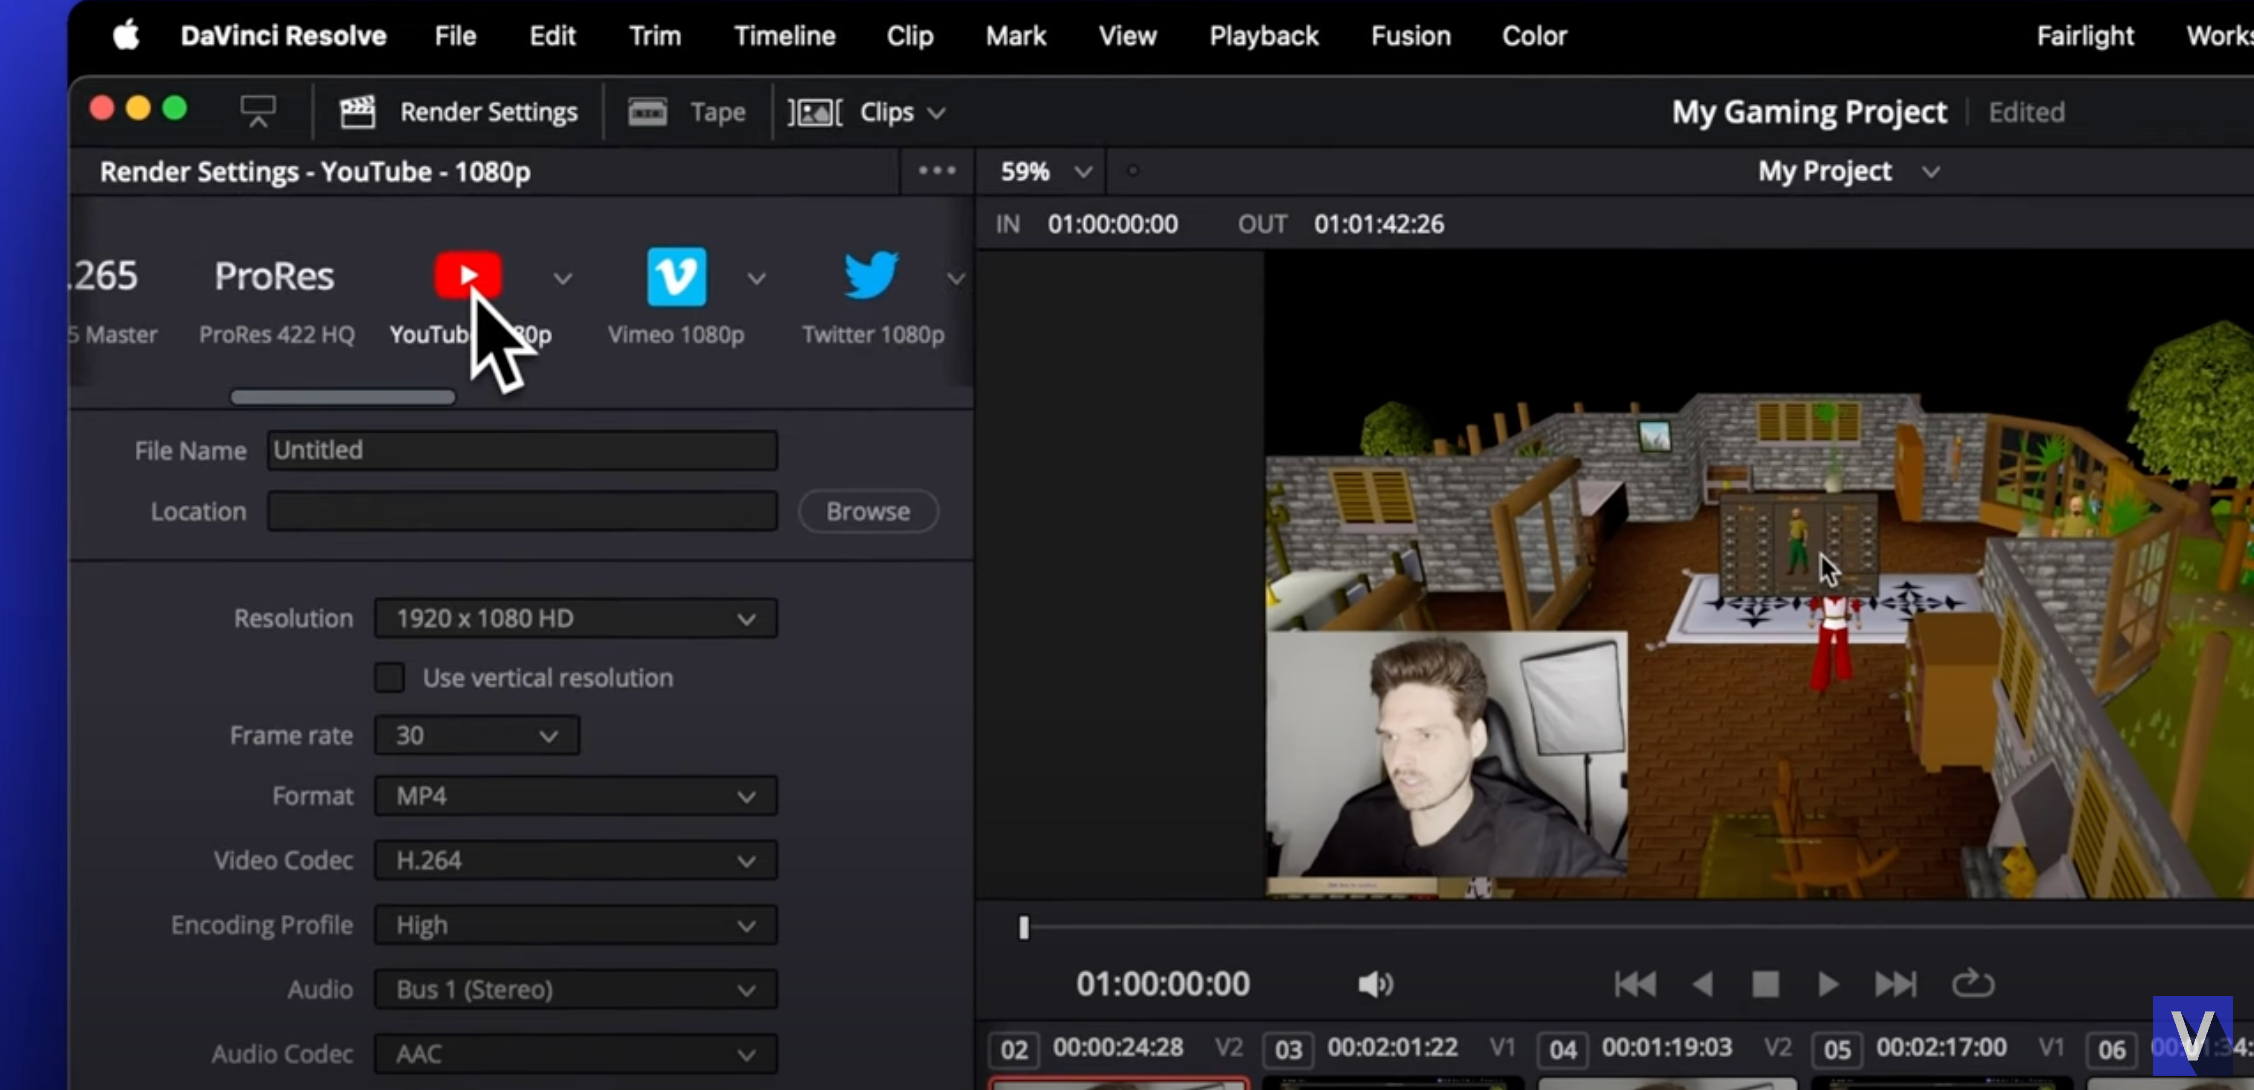
Export
Once you’re done, your video will be ready to export.
- Deliver: Go to the Deliver tab in DaVinci Resolve.
- YouTube Preset: Select the ‘YouTube 1080p’ preset.
- Render Settings: Name your video, choose an export location and click ‘Add to Render Queue’.
- Render: Click ‘Render All’ to export your video.
Once exported, you can upload your video to your YouTube gaming channel and share it on your other social media platforms.
Final Thoughts
Editing gaming videos for your YouTube channel is a skill that can be learned with practice and the right tools. With DaVinci Resolve, you can create pro-level videos by organizing your media, syncing audio and video, framing, trimming, adding effects, and balancing audio.
Use Viddyoze templates to take your content to the next level with transitions, logos, lower thirds, calls to action, and more.
Give these tips a try, and you’ll be editing and creating gaming videos like a pro in no time.